Powered by Blogger.

Knowledge Dojo

    • Home
    • JavaScript
    • _Concepts
    • Unity
    • C#
    • About
    • Contact

    Hoisting is a process in which all variables and method declarations are moved to the top of the executing program, no matter at what position we write them.
    In other words, a variable or a function can be used even before its declaration in a code block.
    doSomething();
    
    function doSomething()
    {
       val = 10;
       val += 11;
    
       console.log(val);
    
       var val;
    }
    
    Output
    21

    Here, we are assigning (val=10), altering (val += 11) and logging (console.log) the value of the variable val even before the declaration of the variable. Also, we are calling the method before its declaration and still the code is working. This mechanism is called Hoisting.
    Now, consider this hoisting mechanism:
    function doSomethingNew()
    {
       console.log(val);
       var val = 10;
    }
    
    doSomethingNew();
    Output
    undefined
    Calling the doSomethingNew() method gives undefined. But why?
    This is because the interpreter follows a defined flow which involves:
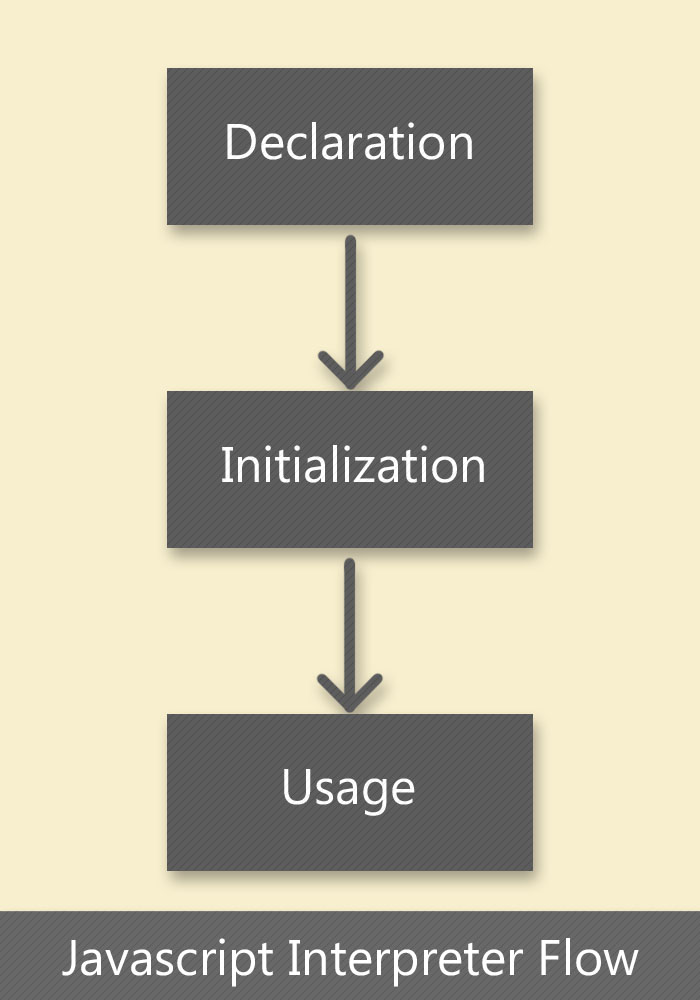
    Javascript interpreter flow

    In doSomethingNew() method, the variable val is declared first.
    In javascript, all variables are initialized with the default value undefined.
    Then we log the variable on Line 3 which will give undefined. Finally, the value 10 would get assigned to the variable val.
    So the actual code created by the interpreter would look like:
    function doSomethingNew()
    {
       var val;
       console.log(val);
    
       val = 10;
    }
    
    doSomethingNew();
    
    Now, using the val after assigning it value will give its value as 10 like the code below.
    function doSomethingAgain()
    {
       console.log(val);
       var val = 10;
       console.log(val);
    }
    
    doSomethingAgain();
    
    Output
    undefined
    10

    Scope for Hoisting

    The scope for hoisting is limited to the code block in which the code is executing. This means we are able to access the variables only in the code block where the variable is accessible.
    var a;
    
    function demo()
    {
       a = 10;
       var b = 20;
    
       console.log("Inside demo function");
       console.log(a);
       console.log(b);
    }
    
    demo();
    
    console.log("Outside demo function");
    console.log(a);
    console.log(b);
    
    Output
    Inside demo function
    10
    20
    Outside demo function
    10
    Uncaught ReferenceError: b is not defined
    As you can see, we get a reference error when we try to access the variable b outside demo function. This is because the scope of variable b is limited to demo method and we cannot use it outside.

    Strict Mode

    ES5 has a strict mode that prevents hoisting. All we need to do is to write 'use strict'; statement before the javascript code and the browser will give an error stating that the variable is not defined in case of hoisting.
    Dependency injection is a design pattern that allows us to create loosely coupled classes.
    To understand loosely coupled classes, let us understand there opposite i.e. tightly coupled classes.

    Tightly Coupled Classes Example

    tight coupling between classes

    Consider this two classes:
    public class Class1: IClass1
    {
     public IClass2 class2;
    
     public Class1()
     {
      class2 = new Class2();
     }
    }
    
    public class Class2: IClass2
    {
    }

    instance of class 2 injected in class 1


    As you can see, Class 1 instantiates the object of Class 2 in its constructor.

    What if the logic for object instantiation for class 2 changes, class 1 also needs to be changed. This is called tight coupling between classes. To prevent such scenario, we use a design pattern called dependency injection.

    What is dependency injection?

    According to dependency injection, instead of instantiating the dependency object in a class, we just pass the dependency along with the object in its constructor.

    Dependency Injection may also be called as Inversion Of Control (IoC) as it follows the Hollywood Principle
    "Don't call us, We will call you."

    Dependency Injection In Action

    This can be well explained with the help of this example:

    Consider the architecture of a MathsCalculator class such that it is the concrete implementation of interface IMathsCalculator. The MathsCalculator class uses a MathsService instance to compute mathematical calculations like SquareRoot, CubeRoot etc.

    Here we will be using the dependency injection design pattern to decouple the two classes MathsCalculator and MathsService.

    class MathsCalculator: IMathsCalculator
    {
     IMathsService mathsService;
    
     MathsCalculator(IMathsService mathsServiceInstance)
     {
      mathsService = mathsServiceInstance;
     }
    
     float SquareRoot(float num)
     {
      float num = this.mathsService.sqrt(num);
      return num;
     }
    }
    
    void main()
    {
     IMathsService mathsService = new MathsService();
     IMathsCalculator mathsCalculator = new MathsCalculator(mathsService);
    
     float result = mathsCalculator.SquareRoot(5);
    
     Console.WriteLine(" Square Root: "+result);
    }
    
    Observe the way we injected the mathsService instance in the MathsCalculator object's constructor.

    This method to inject a dependent object in other class object is called as dependency injection.

    The main objective of the concept is that the class using service instances need not know about the service instantiation. It all should know about using the instance.
    Inversion of control is called so because it inverts the procedural programming flow.
    Instead of the class looking for its dependency to instantiate, we provide the class object with the instantiated dependency.

    Advantage of using Dependency Injection

    The advantage of using Dependency Injection is it simplifies unit testing of the project. Consider if the service injected makes use of internet services, messaging services, etc such that they only need to be mocked in unit testing. While executing the unit testing, we can provide a mock internet service or a mock messaging service, so that we do not end up with actual messaging to real people while unit testing the code.

    Now consider the scenario when there are nested dependencies injected like
    Class1 has dependency Dependency1
    Dependency1 has dependency Dependency2

    The code for instantiating the instance of Class 1 would be like:
    var instance = new Class1(new Dependency1(new Dependency2()));
    This looks a bit confusing. To prevent this, we use DI Containers. I have created a separate article on DI Containers which can be found here.
    Implementing the DI Containers >
    If you have been developing applications with C#, then you must have encountered a concept named delegates. Delegates in C# can be referred as a pointer to methods.
    Instead of calling a method directly with its name, we call the method with its reference. They can be used for events and callbacks.

    A Direct method call would look like:

    FindSquare(5) // to get the square of a number
    or, Factorial(5); //to find factorial of a number
    

    how a c# function call works


    A delegate call (pseudocode) would look something like:


    delegate numberChanger = FindSquare->Reference


    where numberChanger is the name is the delegate that holds the reference to the function.


    Implementing a simple numberChanger delegate

    Consider the following method:
    int FindSquare( int number )
    {
        return (number*number);
    }
    

    To create a delegate, we need to create a new delegate object using the new operator.

    The syntax for delegate declaration is:

    delegate <return-type> <delegate-name> (<parameters>)

    The actual implementation will look like:

    Step 1: Declaring the delegate
    delegate int ModifyNumber(int number);

    Step 2: Instantiating the delegate 
    var numberModifier = new ModifyNumber(FindSquare);

    Note that the parameter is the name of the method that we want to reference with the delegate.

    Step 3: Using the delegate
    int number = numberModifier(5);

    class Program {
     delegate int ModifyNumber(int number);
    
     static int FindSquare(int number)
     {
      return (number * number);
     }
    
     static void Main(string[] args)
     {
      var numberModifier = new ModifyNumber(FindSquare);
      int temp = numberModifier(5);
      Console.WriteLine(temp);
     }
    }

    C# Program
    delegate simple example to modify a number

    Output
     25                                      

    Delegate Chaining

    The benefit of using delegate is that it allows chaining of method calls in a single delegate reference.

    like, delegate "print" can point to two different methods
    1. printing the output to console
    2. ‎saving the output in a log file

    But how? Let's see this in action.


    Consider the following two methods:

    static void WriteToConsole(string name)
    {
        Console.WriteLine("Name is : " + name);
    }
    
    static void WriteToFile(string name)
    {
        //Code to write name to file
        Console.WriteLine("Written name to file : " + name);
    }

    Here, we will be creating a delegate such that calling the delegate will invoke these two methods one by one.

    Step 1: Declaring the delegate (Same as we did before)

    delegate void NameWriter(string str);

    Step 2: Creating new delegate objects pointing to these methods.

    var writeToConsole = new NameWriter(WriteToConsole);
    var writeToFile = new NameWriter(WriteToFile);
    

    Step 3: Create empty delegate variable.
    We will use this delegate to call the chained methods.

    NameWriter nameWriter;

    Step 4: Setting nameWriter reference to the first method.

    nameWriter = writeToConsole;
    Notice, how we assigned the variable writeToConsole to the nameWriter variable.

    Step 5: Chaining/Appending references of other methods to the delegate.

    New references are chained to a delegate in the following manner:

    nameWriter += writeToFile;
    Here we appended the writeToFile reference to the nameWriter.

    Step 6: Using the nameWriter delegate.

    nameWriter("Kunal");

    The following output will be produced when executing the above code:

    C# Program
    class Program
    {
     static void WriteToConsole(string name)
     {
      Console.WriteLine("Name is : " + name);
     }
    
     static void WriteToFile(string name)
     {
     //Code to write name to file
      Console.WriteLine("Written name to file : " + name);
     }
     
     /************* Step 1 *************/
     delegate void NameWriter(string str);
     /**********************************/
     
     static void Main(string[] args)
     {
      /************* Step 2 *************/
      var writeToConsole = new NameWriter(WriteToConsole);
      var writeToFile = new NameWriter(WriteToFile);
      /**********************************/
     
      /************* Step 3 *************/
      NameWriter nameWriter;
      /**********************************/
     
      /************* Step 4 *************/
      //appending functionalities to write name
      nameWriter = writeToConsole;
      /**********************************/
     
      /************* Step 5 *************/
      nameWriter += writeToFile;
      /**********************************/
     
      /************* Step 6 *************/
      //write names to console and to file in this single statement
      nameWriter("Kunal");
      /**********************************/
      
      //wait for keypress to exit
      Console.ReadKey();
     }
    }
    

    Output:


    And done. You just appended multiple references to a single delegate and calling this delegate will call all of the chained methods one by one.
    Older
    ARTICLES

    IEnumerable vs ICollection vs IList vs IQueryable in C#

    Popular Posts

    • Audio latency on Unity 3d Android Platform
    • HTTP Interceptor in Angular 4

    Created with by BeautyTemplates

    Back to top